
How to: Slay Liner for ROUND EYES?!

Eye contact is a dangerous, dangerous thing. But lovely. Oh, so lovely.
Welcome to my blog! I am a round-eyed person and I love winged liner. Well, that definitely ain't complementary but nothing can stop me from making my soul up. If you are a round-eyed person, I gotchuu! I have been lining my eyes since quite long now but I have never been regular w liners. I have tried all the types: liquid, gel, pencil, and now markers. But among all, liquid liners are my fav for somethings so strange. Anyways, I have searched a few tricks on the internet and I have found a few on myself and they all are really helpful to me so I hope the same for you.
So, w/o further, let's wing this world!
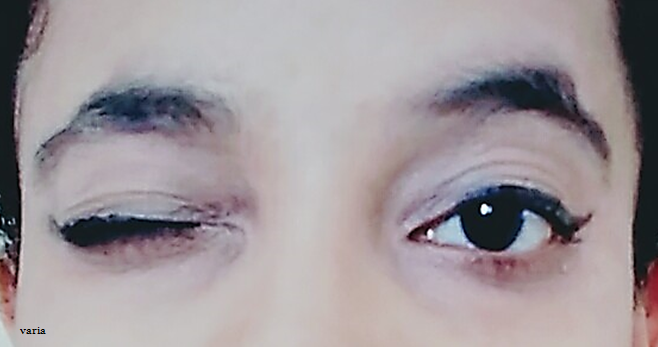
The most common trouble for round eyes is that the eyelids get covered by skin. So the eyeshades aren't visible when we look up or look in front which is so irritating. The skin that covers our eyelids pretends to be the crease, though it ain't the real crease. The actual crease gets hidden in the skin and ain't visible. As a result of all this, round-eyes have less space for lining and hence the liner looks too bold or sometimes merges into the (pseudo)crease.
Bold liners are so dramatic and definitely never go out of fashion. I have two liner looks that you can wear every day and slay the world!
#01. Winged Liner
Being a round-eyed, I always face problem drawing a continuous and sharp wing, since the skin folds come in my way. You can always use the tape trick for getting a sharp wing but I have been doing something else since a few times which works the same way. You will need plastic covers from eyeshade palette (b/w the colors and the mirror). If you don't have one, you can keep a plastic piece in your makeup supplies.
-Use it as a guide and draw a line that will be the wing of your liner.
-Next, leaving little space from the end of the wing, drag it to the middle of your upper lashline. Make sure that you won't make the liner too thick. Go slow. Go in peace. You'll do it.
- Then tilt your head towards the outer side and connect the wing to your upper lashline slowly in little light strokes.
- When you are happy with the shape, fill your liner and you are good to go!
This is the most classy look featuring winged liner. At the end, don't forget to finish with mascara.
#02. Wingless Liner
The process is kinda same as for winged liner, except for the wing.
- Start lining from the outer corner of your eye and then move slowly to the middle. But this time, the outer liner should be thin.
- Then tilt your head towards the outer side and extend the liner towards the inner corner of your eye but don't connect it to the inner corner.
- By this step, you will be left with some 'slit moon' kinda shape with thin liner towards both the corners and thick in the middle.
- Fill your liner and make some adjustments. Go slow. Go peaceful and you'll slay the lining art!

Don't forget to line your upper lashline with a black kohl (irrespective of the style). It will make your eyes look fuller and wider. And coating your lashes with mascara is just an additional step that will bring additional style.
This is the most classy look featuring winged liner. At the end, don't forget to finish with mascara.
 |
| pin it for later! |
The process is kinda same as for winged liner, except for the wing.
- Start lining from the outer corner of your eye and then move slowly to the middle. But this time, the outer liner should be thin.
- Then tilt your head towards the outer side and extend the liner towards the inner corner of your eye but don't connect it to the inner corner.
- By this step, you will be left with some 'slit moon' kinda shape with thin liner towards both the corners and thick in the middle.
- Fill your liner and make some adjustments. Go slow. Go peaceful and you'll slay the lining art!
Don't forget to line your upper lashline with a black kohl (irrespective of the style). It will make your eyes look fuller and wider. And coating your lashes with mascara is just an additional step that will bring additional style.
Thank you for reading. I hope this post will help you. Ask if you have any ques. in the comments below or any suggestions?
Now you can reach me through contact form! Please do. I love reading lovely messages by you all♥
Meet you in the next post!


0 comments
Leave some post suggestions, maybe?